
Lesson 4 – Technique: LINES, or contour drawing
- So, let's start with the first technique: LINE, or drawing a contour.
To implant an ideal contour we need to follow several rules:
- The angle between the machine and the skin should be as close as possible to 90 degrees.
- The hand should have a stable support ( be placed on the face in order to avoid handshaking)
- We must work with 1RL needle
- Work as superficially as possible (the deeply implanted pigment can cause pigment migration)
- Stretch the skin very well to prevent the needle from clinking against the skin folds.
- Drawn sketch clearly to follow the drawn line.
- Do not pass the same place twice this also leads to the spreading of the contour. The first pass must be as thin as a hair, then the second pass can be thicker if needed.
- The contour should start and end invisibly by creating a smooth gradient, any points and spots must be avoided.

So, as the homework task I offer you two exercises - contour and line.
- Latex
- PMU machine
- 1 needle
- Pigment
- Smartphone for recording your work
Homework should look like a photo of the end result.
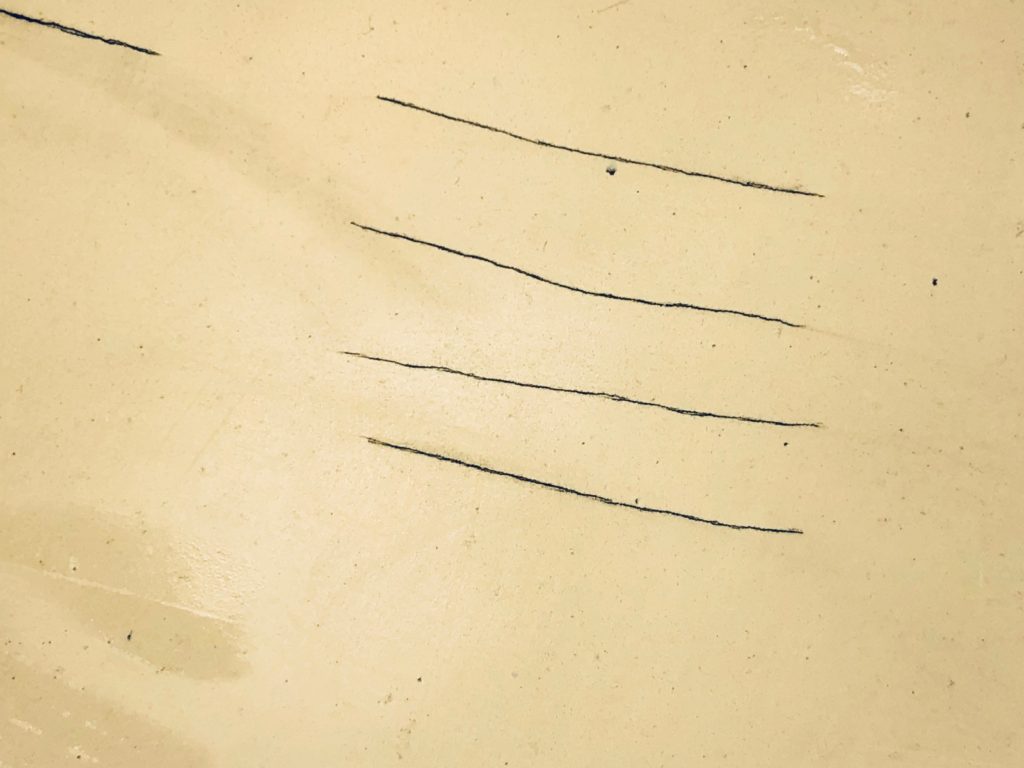
Two lines in a direction from yourself.
Two lines towards you.
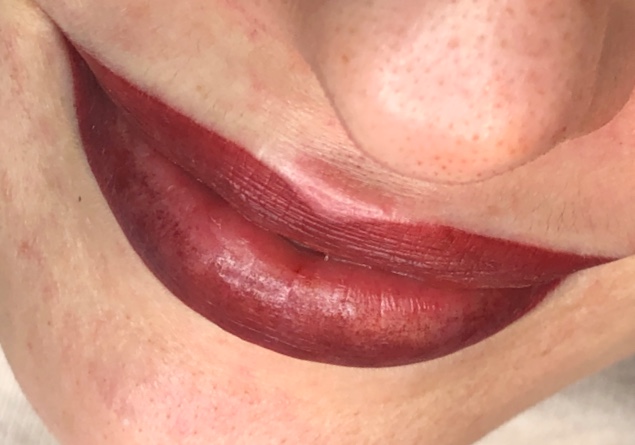
This is a video of full procedure about these lips.
Enjoy

- And a little bit more practice
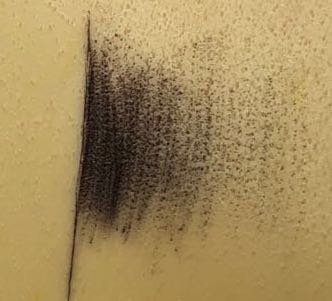
Basic movements of shading 👆🏻👆🏻👆🏻
And smooth gradient, the most important exercise ☝🏻
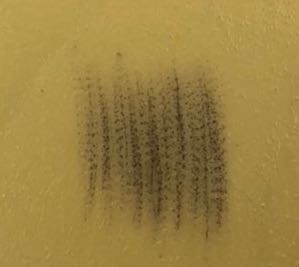
I want to see that you can control the density of your shading by
- Longer strokes - more fluffy
Faster strokes - more fluffy
More distance between strokes- more fluffy - Shorter strokes - more dense color
Slower strokes - more dense color
Strokes close to each other - more dense color
Three main parameters for control your shading
This is your home work 👏🏻👏🏻👏🏻
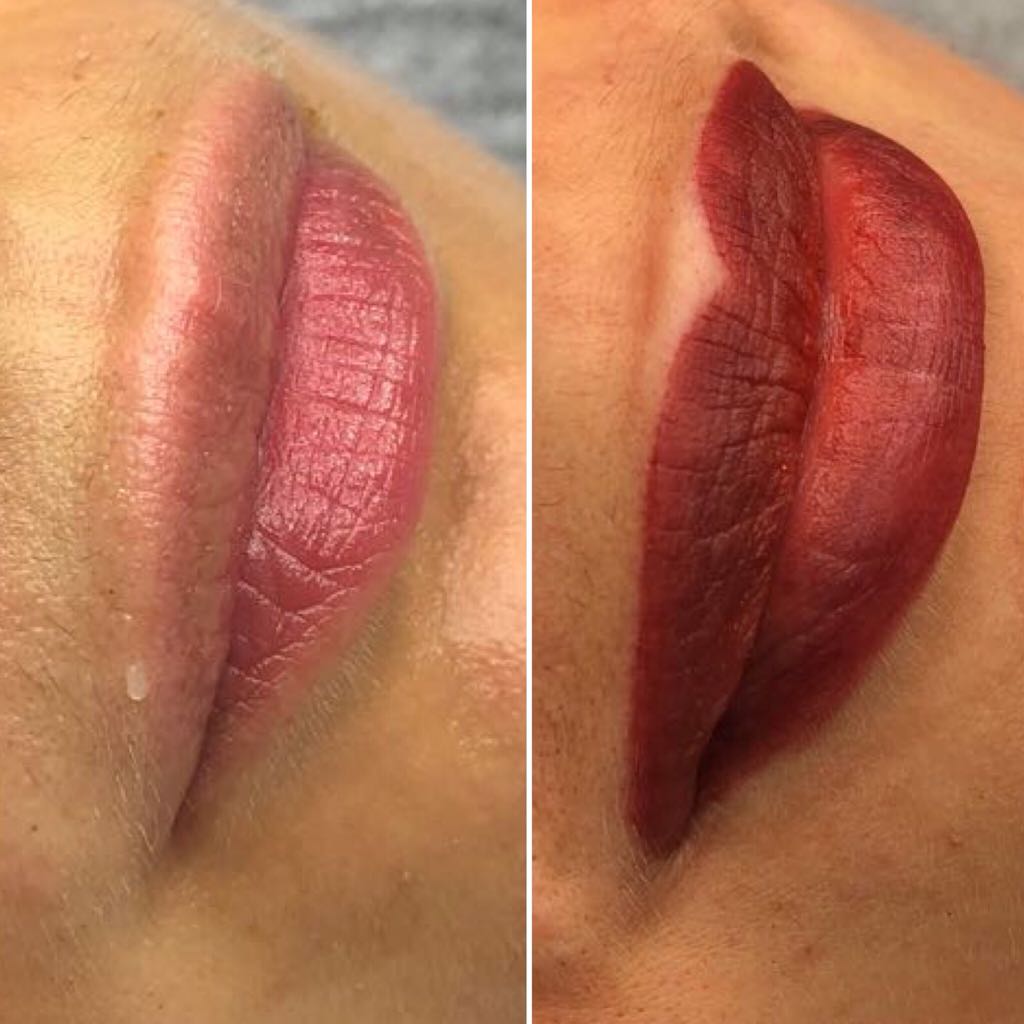
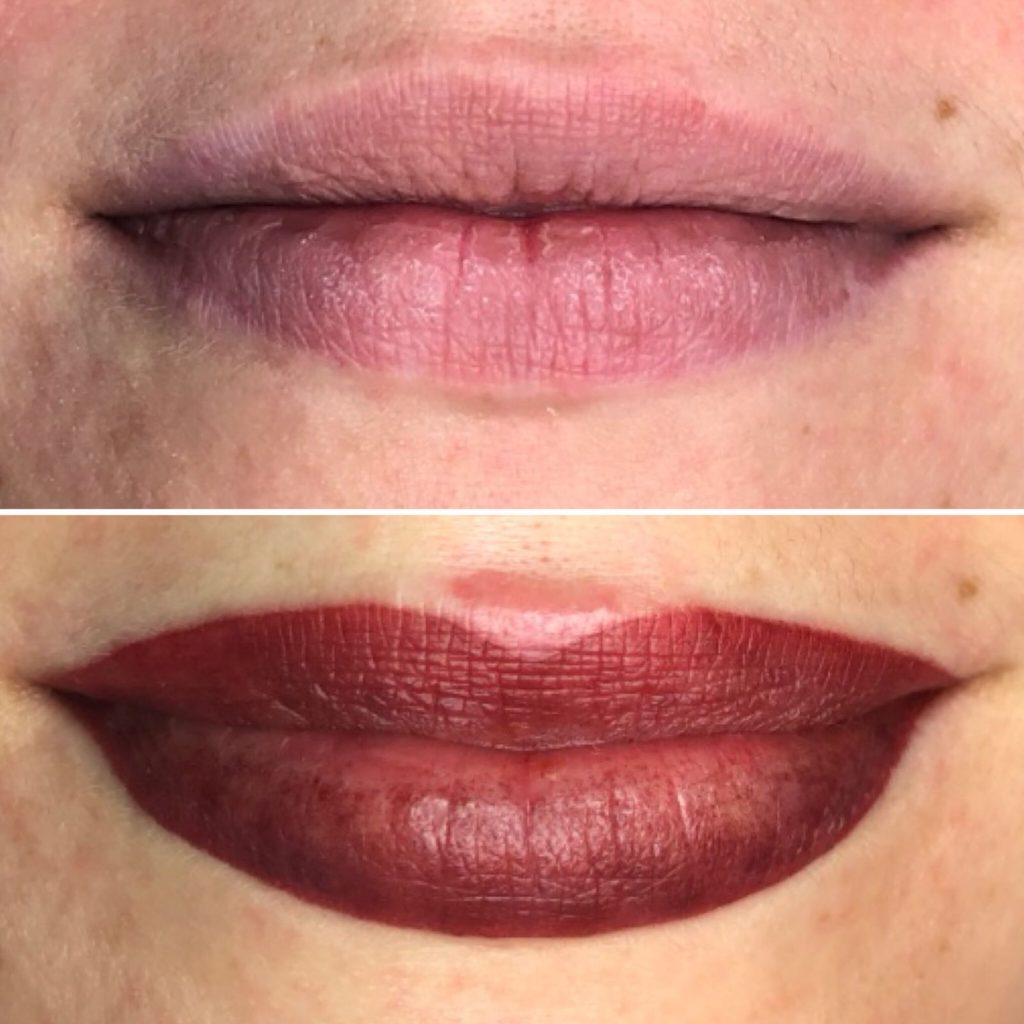
This is Before and immediately after procedure
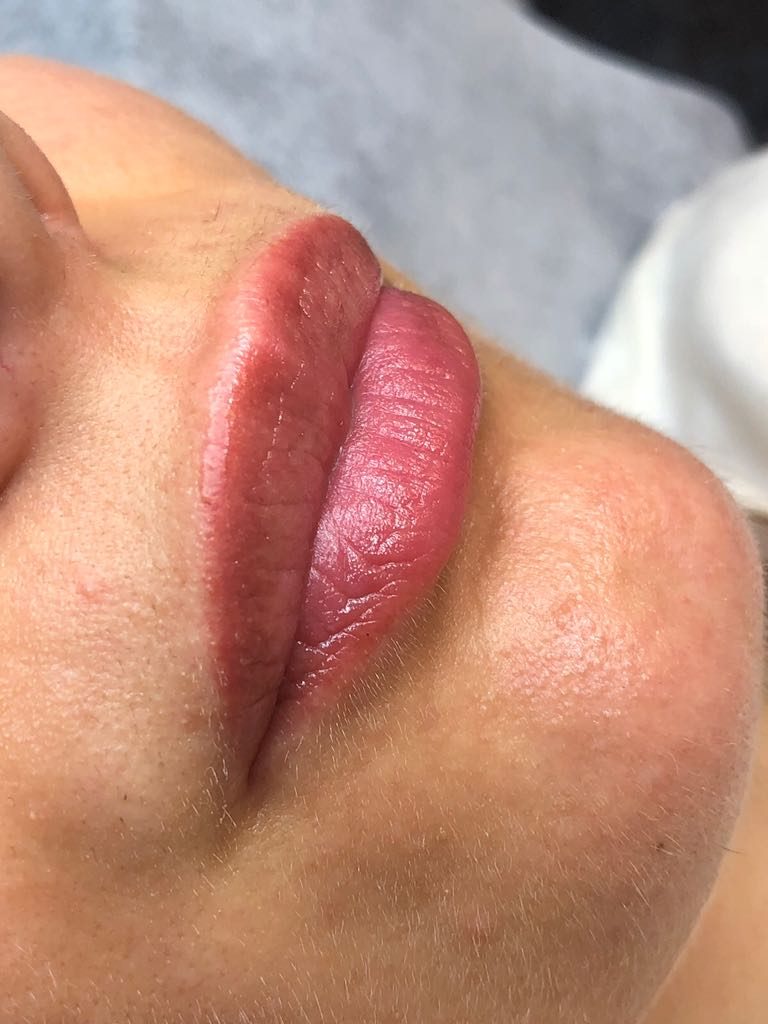
- This is Healed after 1 procedure
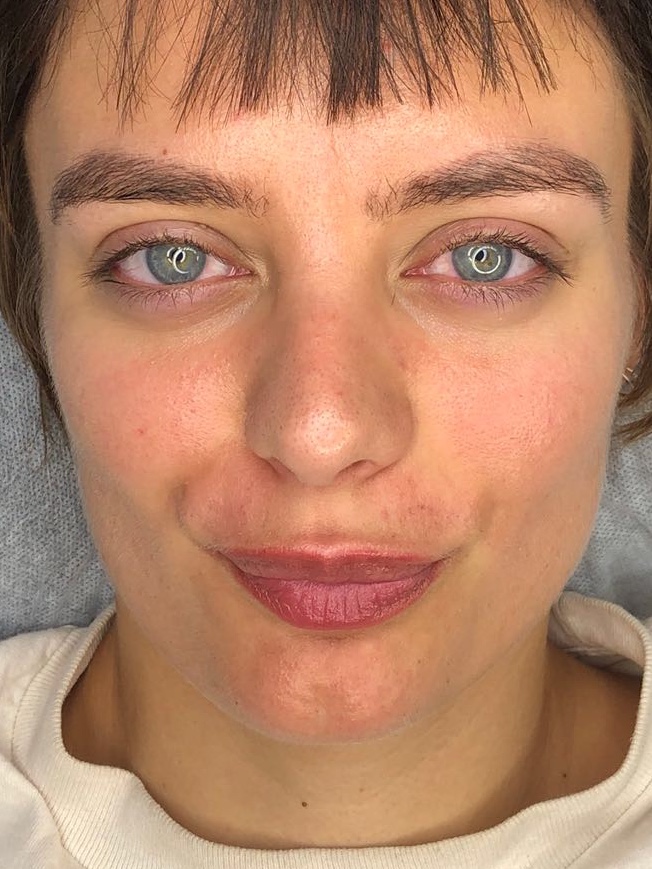
Look how natural they look on this young face 👍🏻
Ps: eyebrows are not my work 😉 this is microblading 😏
Press "complete" and go to the next lesson