
Lesson 2 – Sketch
Let’s talk about the schemes of lips sketch.
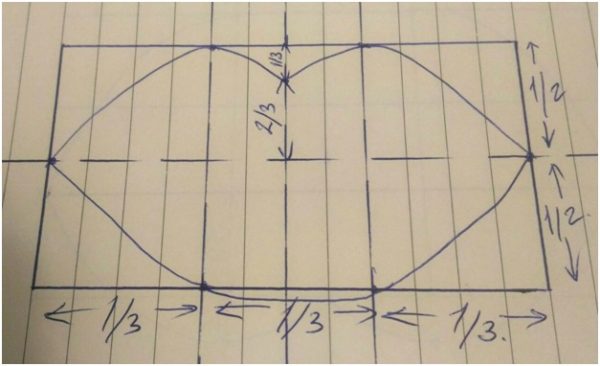
1 method of doing the right shape is the next one: you can draw the rectangle, divide it in half by a horizontal line and into 3 equal parts by two vertical lines. Then you can draw their lips as shown in Figure 1. As you can see this method shows the classical way of doing face shapes with the golden section method.
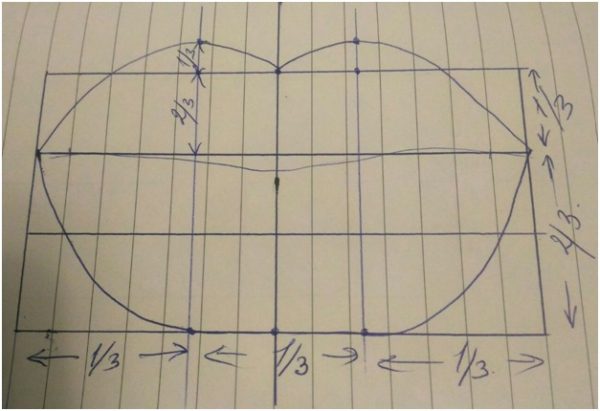
2nd method: You can make the shape of lips a little bit differently, you can draw the rectangle, divide it into 3 equal parts by two horizontal lines and into 3 equal parts by two vertical lines. Then you can draw their lips as shown in Figure2. In spite of all talks about the golden section (what says that upper lip should be 1/3 and lower one should be 2/3), I like the first variant 🙂 But you will have some exact person and exact proportions so just try to adapt it to this exact situation.
You can use a special red PMU pen to draw the sketch. And you can use the usual red gel pen for the same goal. I recommend filling area inside lips too in order to see the shape better. Then you can go around sketch with white cosmetic pen in order to see the shape better with more bright contrast and in order to see the contour even if red starts to be blurry because of anesthesia when you start the procedure.
In addition in order to see all defects of the sketch you can take a photo of lips and you can notice all imperfect things on photo much better than simply having look at the client.
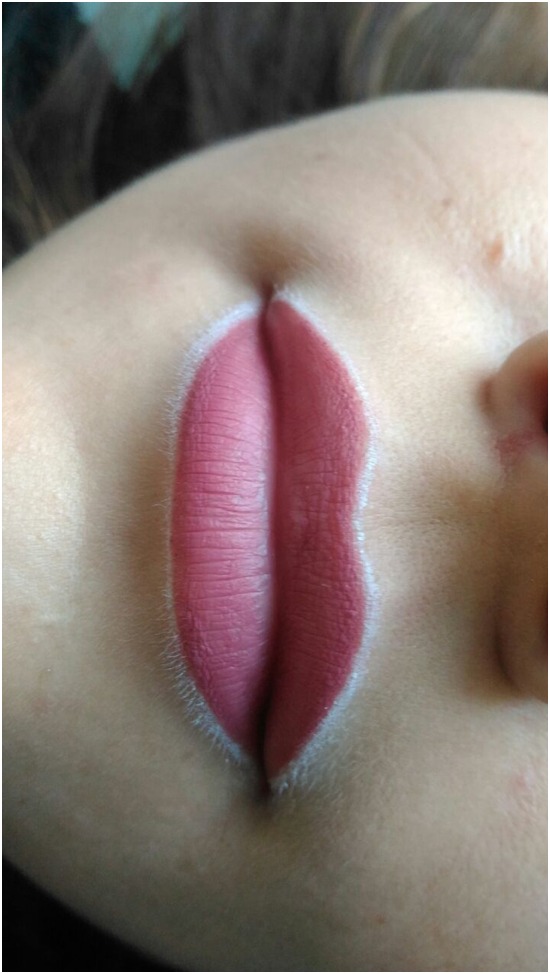
I advise my students to do white contour also in order to see the shape better.
As you see we don’t fill corners of lips too far. Why? This is my personal preference. In time corners go down and lips look sad. So please don’t fill them too far you will avoid this age effect and avoid pigment migration and blurring in corners.
When we clean pigment during procedure all contours don’t stay and go away of course. You just need to make contour accurately in the beginning procedure and then clean everything and fill lips calmly.
Video how we put anesthesia and make contour (Giant Sun 9740 acupuncture needle).
This is mainly the most important work, in my opinion, other work is very primitive in lips PMU.
One more time why acupuncture needle is better than usual 1rl for lips PMU: Acupuncture needles are done from more flexible steel and have special bullet-shaped sharpening which allows turning the needle into the skin much better than other needles with a usual cone shape. And of course, all of these allow putting pigment with much less trauma than in the case with usual PMU needles or tattoo needles.
As for the depth of work.
If you lay pigment deep into lips you will see such specific dark color with blue nuance right during the procedure. It happens because lips have a lot of vessels, situated close to the surface of the skin and deeper in the thickness of tissues which transform all colors to cold colors. Usually, masters make mistake with depth making contour with 1rl needle. This is why we so often have clients for laser removal of dark lips contours.
However, if you work with very light pigments you can’t see some dark pigment, so you should pay attention to the feeling of how deep you go. The right feeling is scratching of the skin with light vibration, but you should see that pigment stays in the skin at the same time. If you see that lymph or blood appear a lot, (not some separated little drops, but a lot of drops of blood and lymph) you should understand that you are working too deep or the woman has the period or she is close to period. Any way both cases are not good for PMU.